
Skip to content
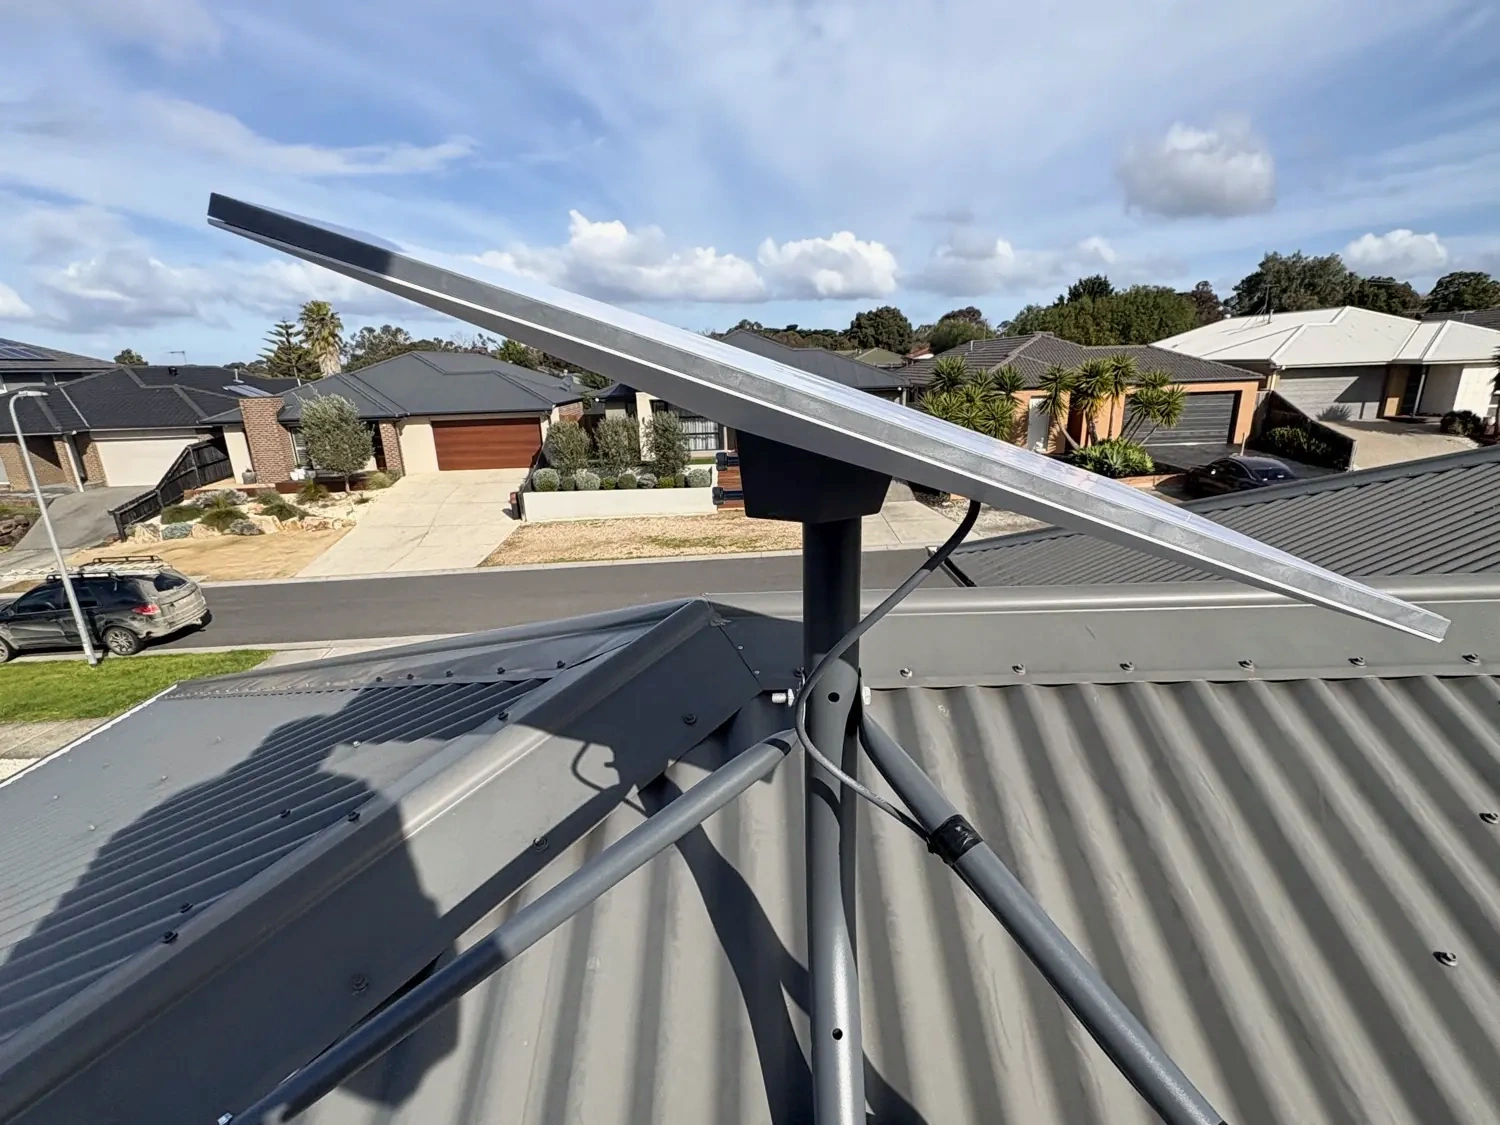
Completed installation at a home.
Starlink

Roof, wall and tripod mounts

Tile roofs get an under-tile mount. Colorbond roofs get a tripod tied down using the existing roof screws. Some homes suit a fascia or wall mount.
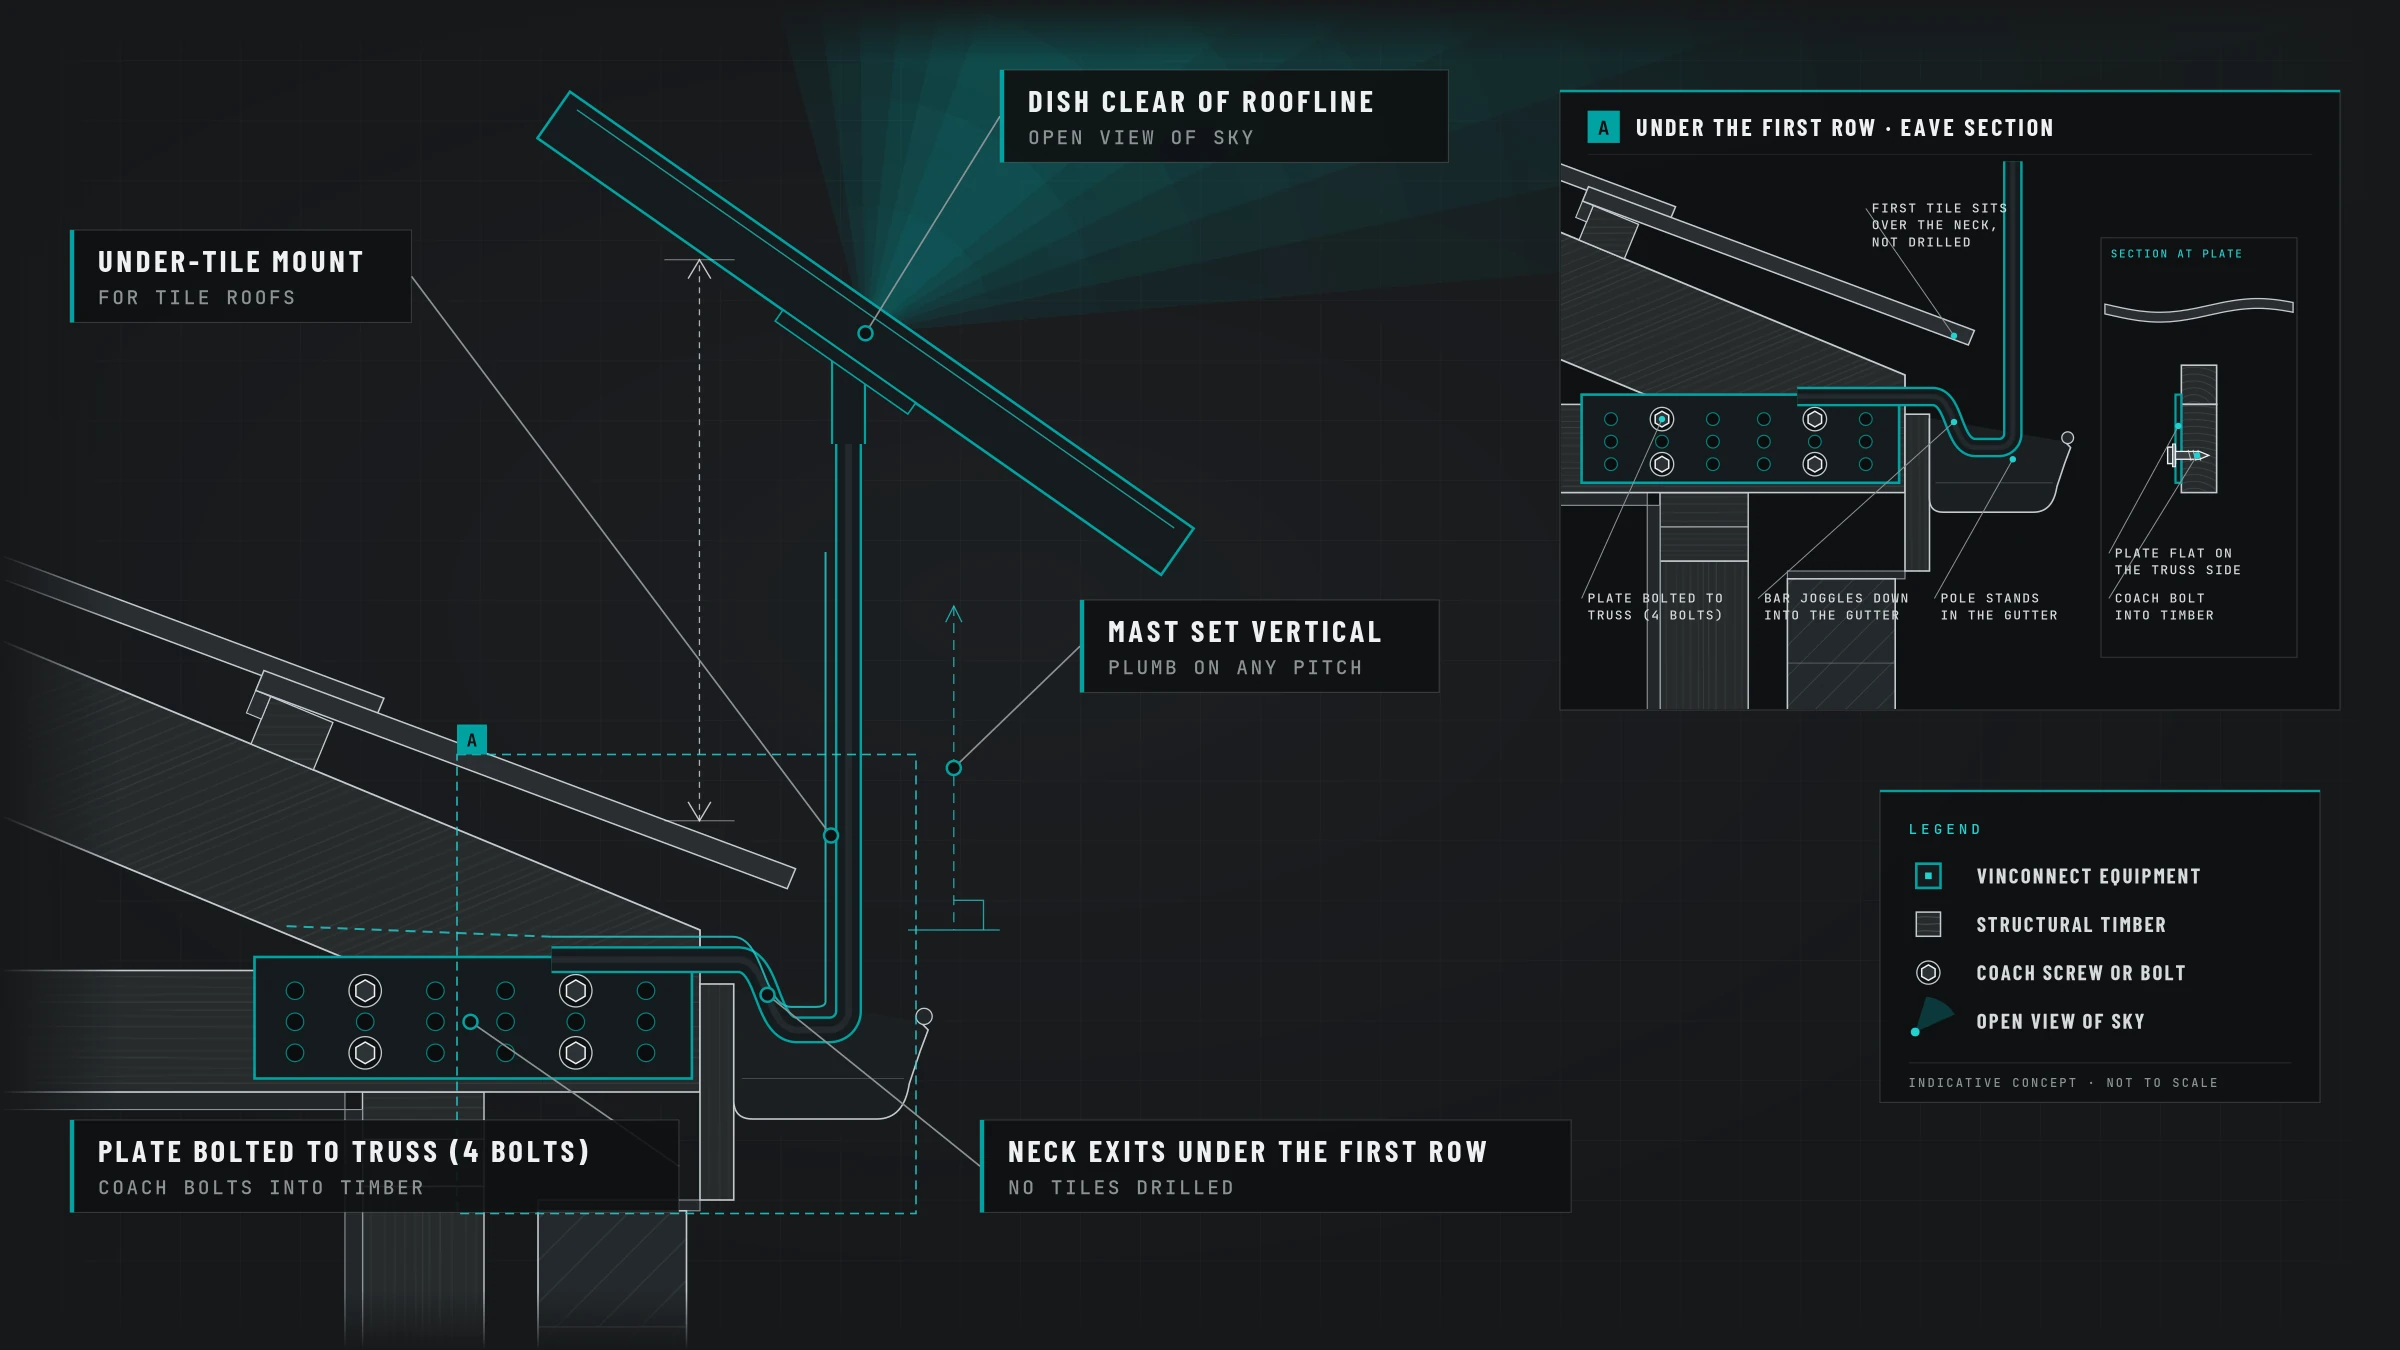
Starlink Standard dish on an under-tile mount. A slotted plate is fixed to the rafter under the tiles, the tile slides back over it, and a short mast holds the dish clear of the roof.
Under-tile mount
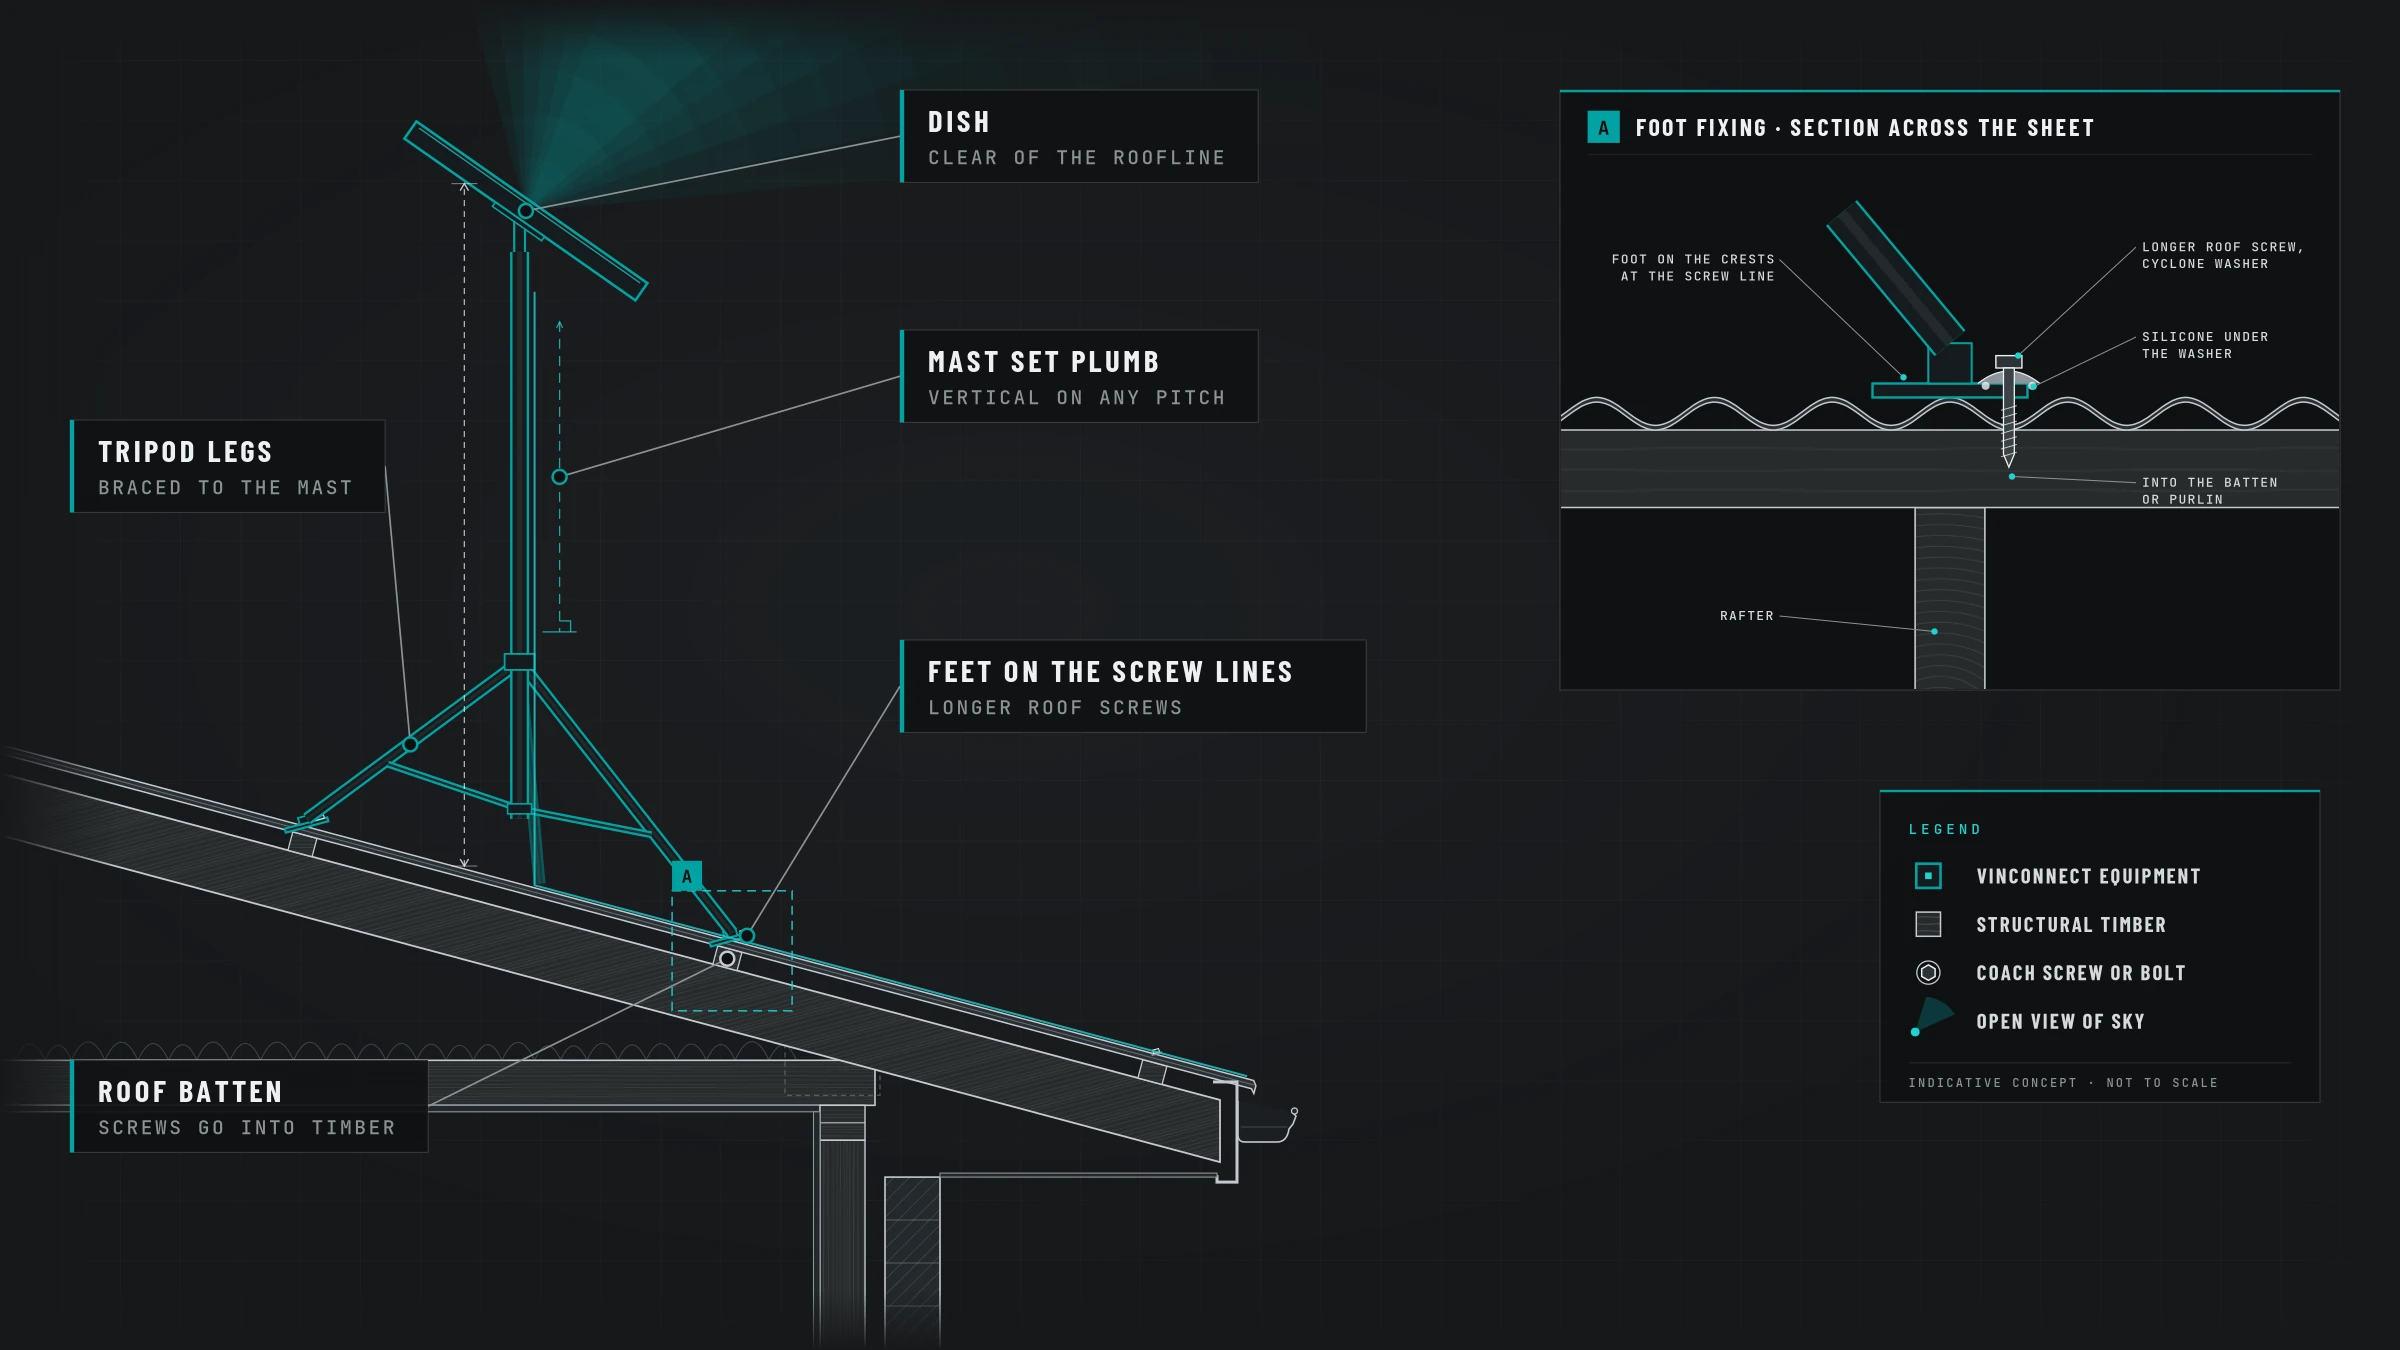
Starlink Standard dish on a tripod on a Colorbond roof. The feet are fixed with longer roof screws at the existing screw spots, and the dish sits clear of the roof.
Tripod (Colorbond roofs)
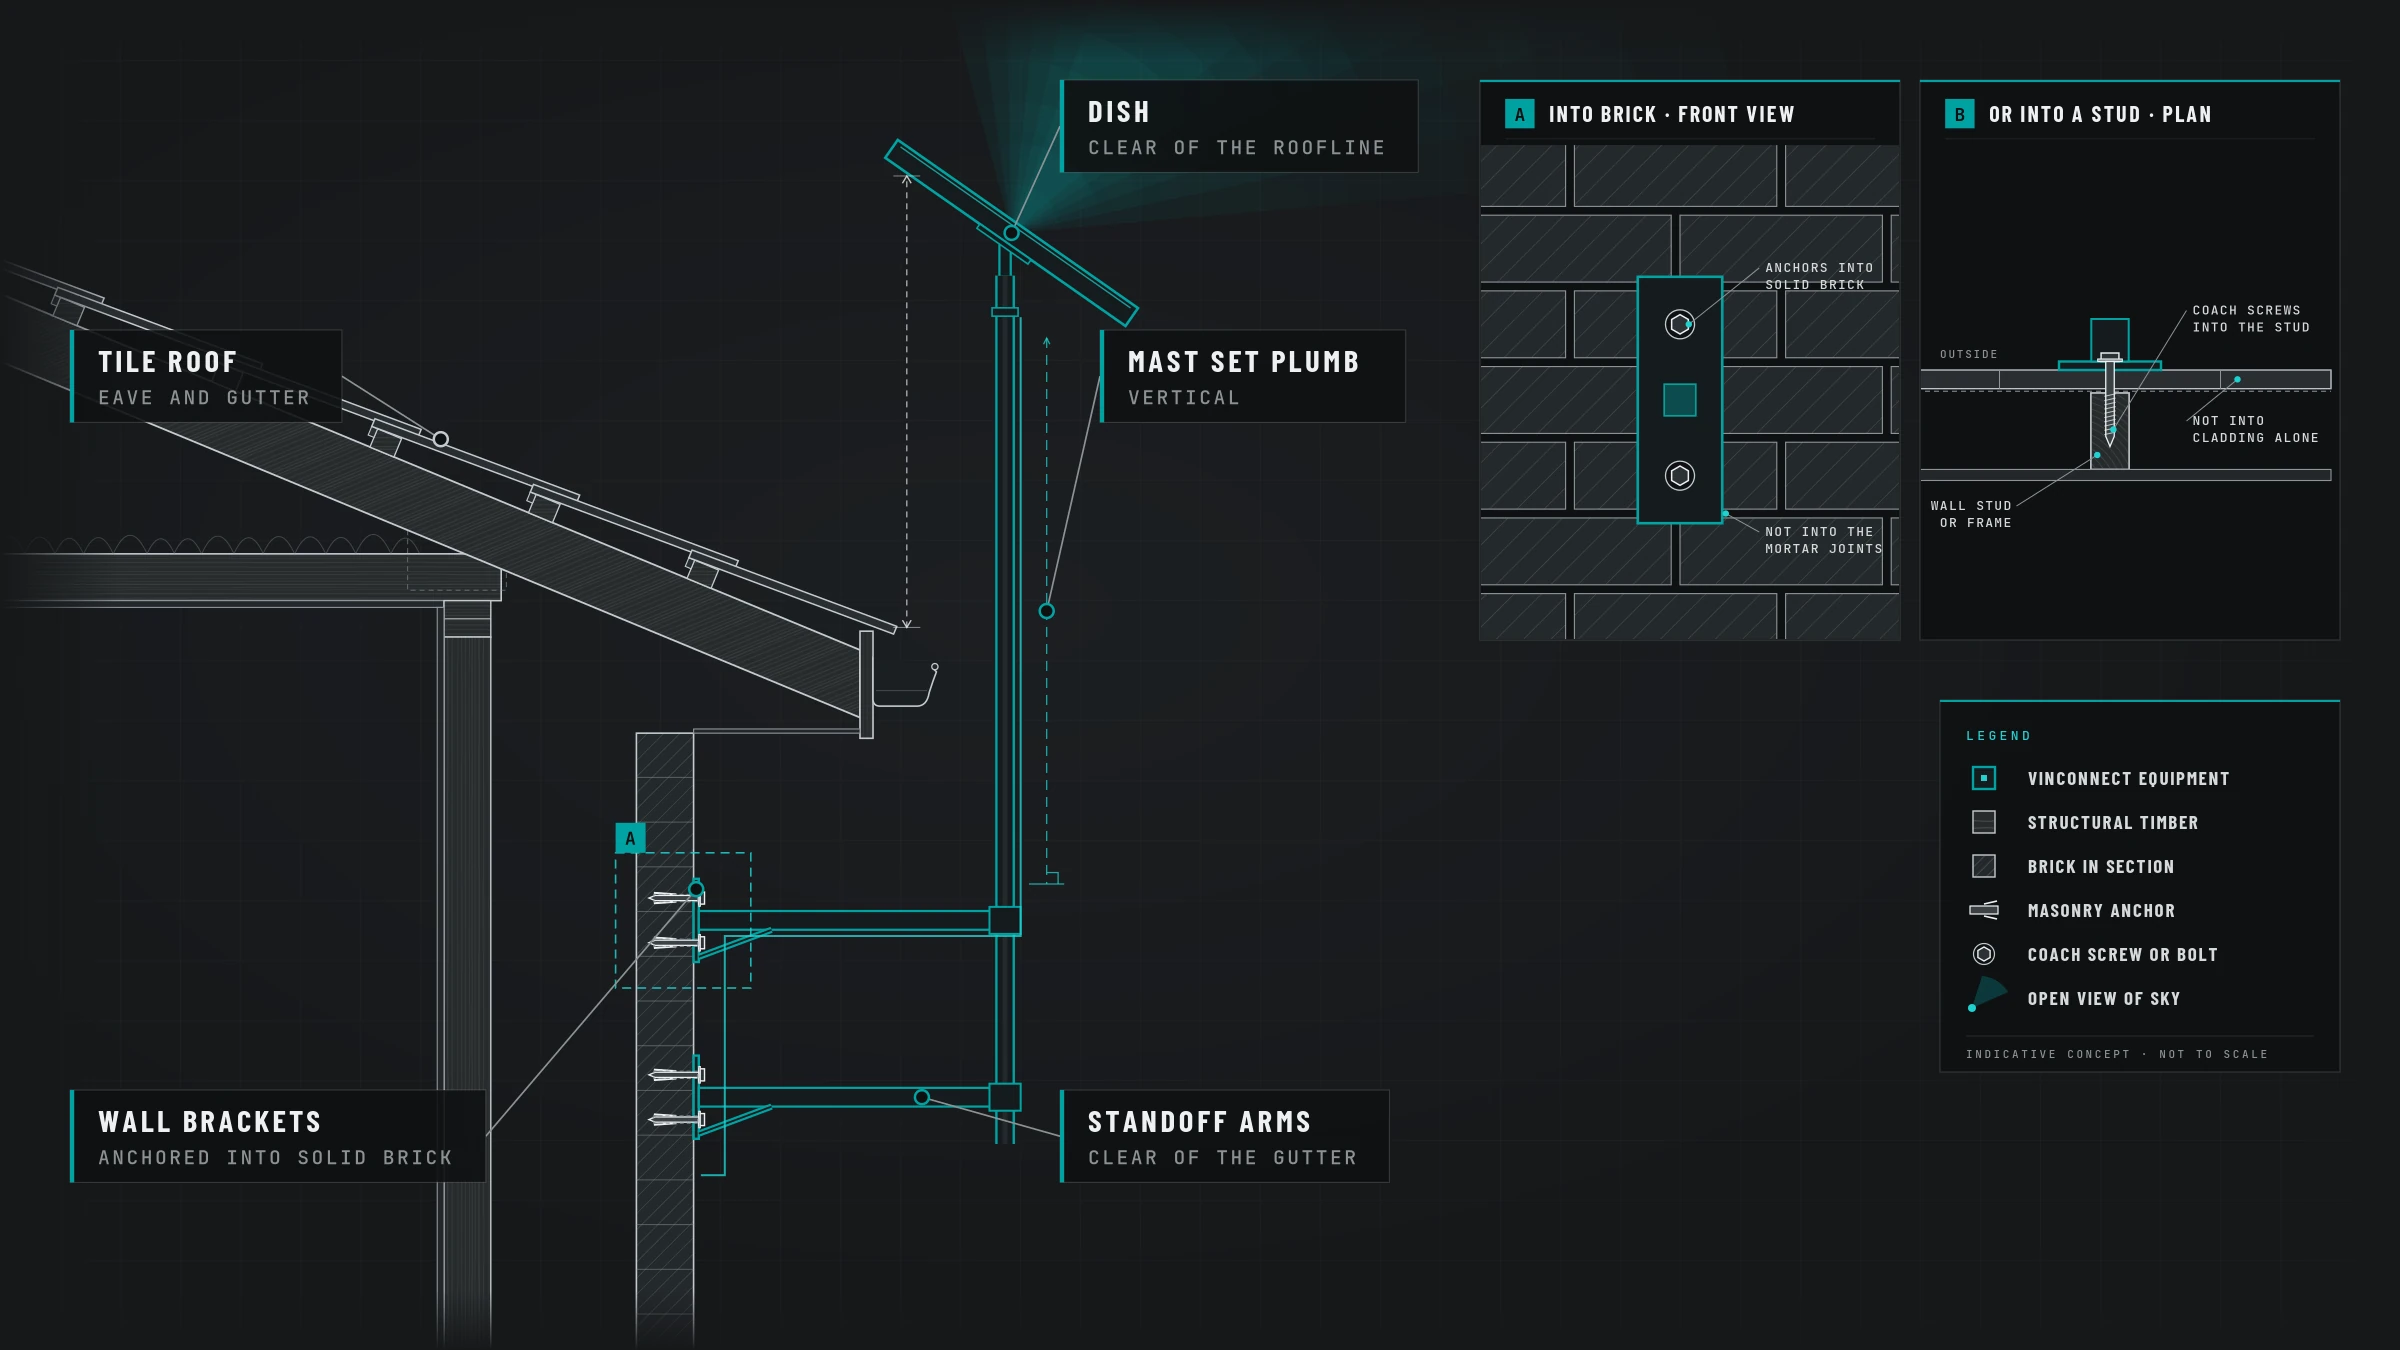
Starlink Standard dish on a wall mount under the fascia. Brackets on the fascia hold a straight mast, and the dish sits clear of the roof.
Wall mount under the gutter or fascia

What we look at

We look at the roof type, pitch, eaves, wind and where the sky is clear.

Starlink Standard dish on an under-tile mount. A slotted plate is fixed to the rafter under the tiles, the tile slides back over it, and a short mast holds the dish clear of the roof.

Under-tile mount

On tile, the under-tile mount's bracket fixes to the side of a roof truss and the tile slides back over it, so no tiles are drilled.

Starlink Standard dish on a tripod on a Colorbond roof. The feet are fixed with longer roof screws at the existing screw spots, and the dish sits clear of the roof.

Tripod

On Colorbond, the tripod is fixed with longer roof screws at the existing screw spots.

Completed jobs in Somerville and Safety Beach used Astrogear tripods so the roof did not need a hole. Cranbourne West used a tripod on a double-storey corrugated metal (Colorbond-style) roof.

Starlink Standard dish on a wall mount under the fascia. Brackets on the fascia hold a straight mast, and the dish sits clear of the roof.

Wall mount

Some homes suit a fascia or wall mount. Before a fascia mount we check the fascia: timber gets coach bolts, sometimes with a spacer, and Colorbond fascia gets a timber or metal backing plate.

Starlink Standard dish on the roof. The cable goes in under the first row of tiles at the eave, straight down the wall cavity between the brick and the stud wall, past the mid-height noggin, and through to a wall plate on the plaster side.

Cable route

On a brick-veneer home with a clear gap between the brick and the stud wall, the cable goes in under the tiles at the eave, down the wall cavity between the brick and the stud wall, past the noggin, to a wall plate on the plaster side. That is included in the standard install.

On cladded, rendered foam or Hebel walls with no gap, the noggins are drilled through. That is $150 extra.

If the cavity can't be used, we agree on an outside cable route. External cable in conduit costs 99 for up to 5 m. Longer runs are quoted.

We don't run the cable through internal walls.

Questions

Do you supply the tripod?
When the quote lists it. Circl jobs use the hardware Circl specified. Direct jobs can use a tripod you already have if it is suitable — we will say if it is not.

Also in Starlink guides

Related

What will it cost?

A few quick questions and you'll see your price.

Get my price

Or call Vince on 0408 559 555