
Sky view comes first. A neat mount under a tree is still a bad mount. After that we look at the structure: tile, Colorbond, a flat roof with a concealed gutter, a rental that will not accept a penetration, or a second storey where access is the real cost.
The usual options
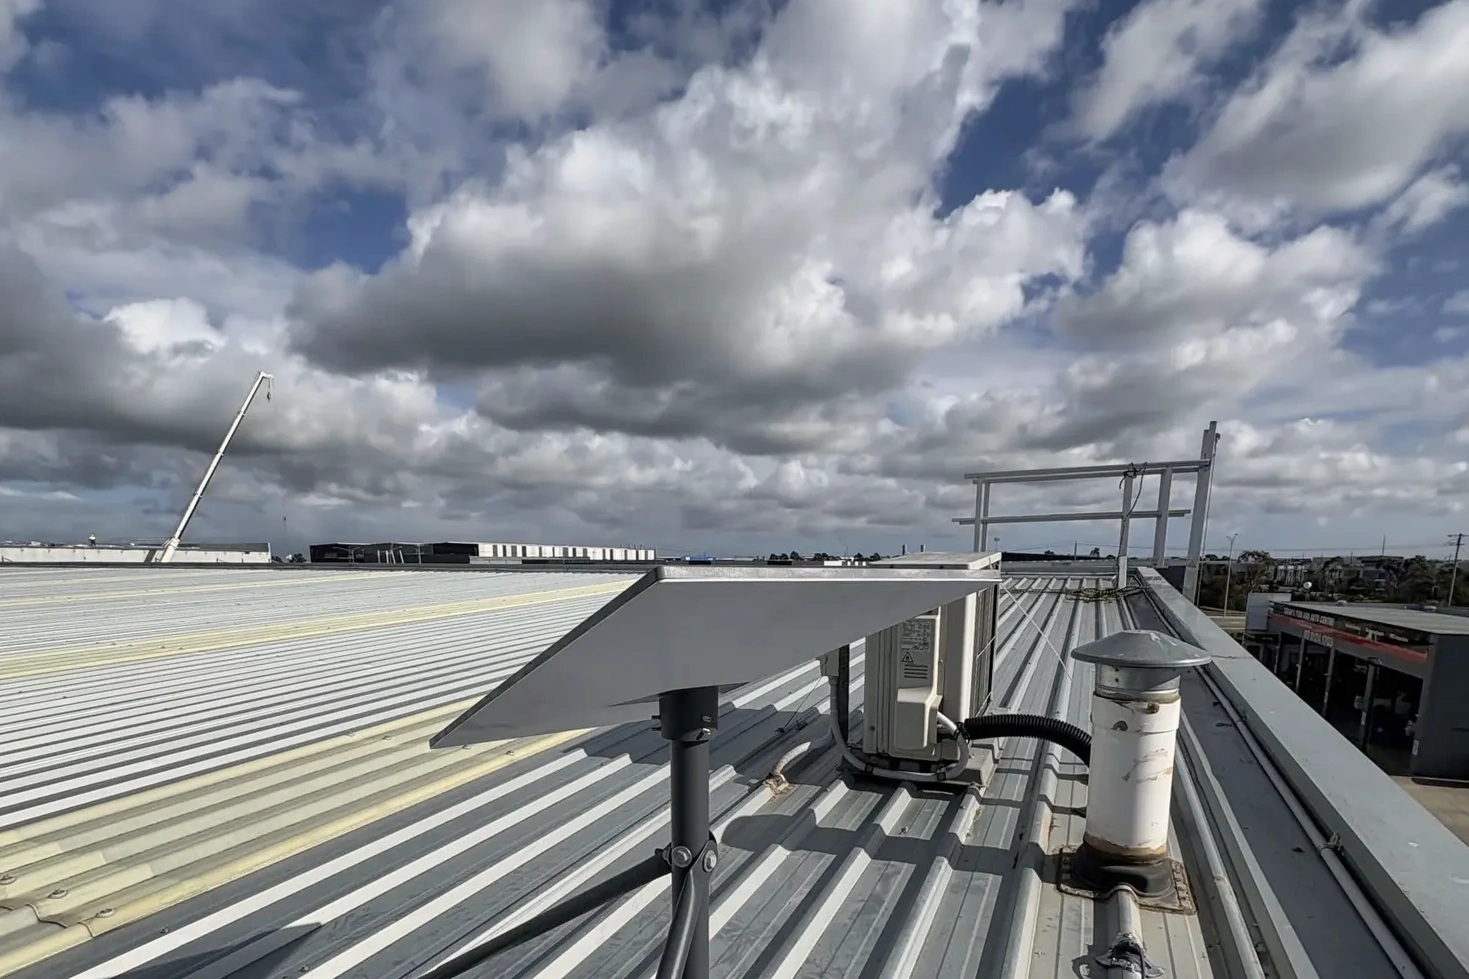
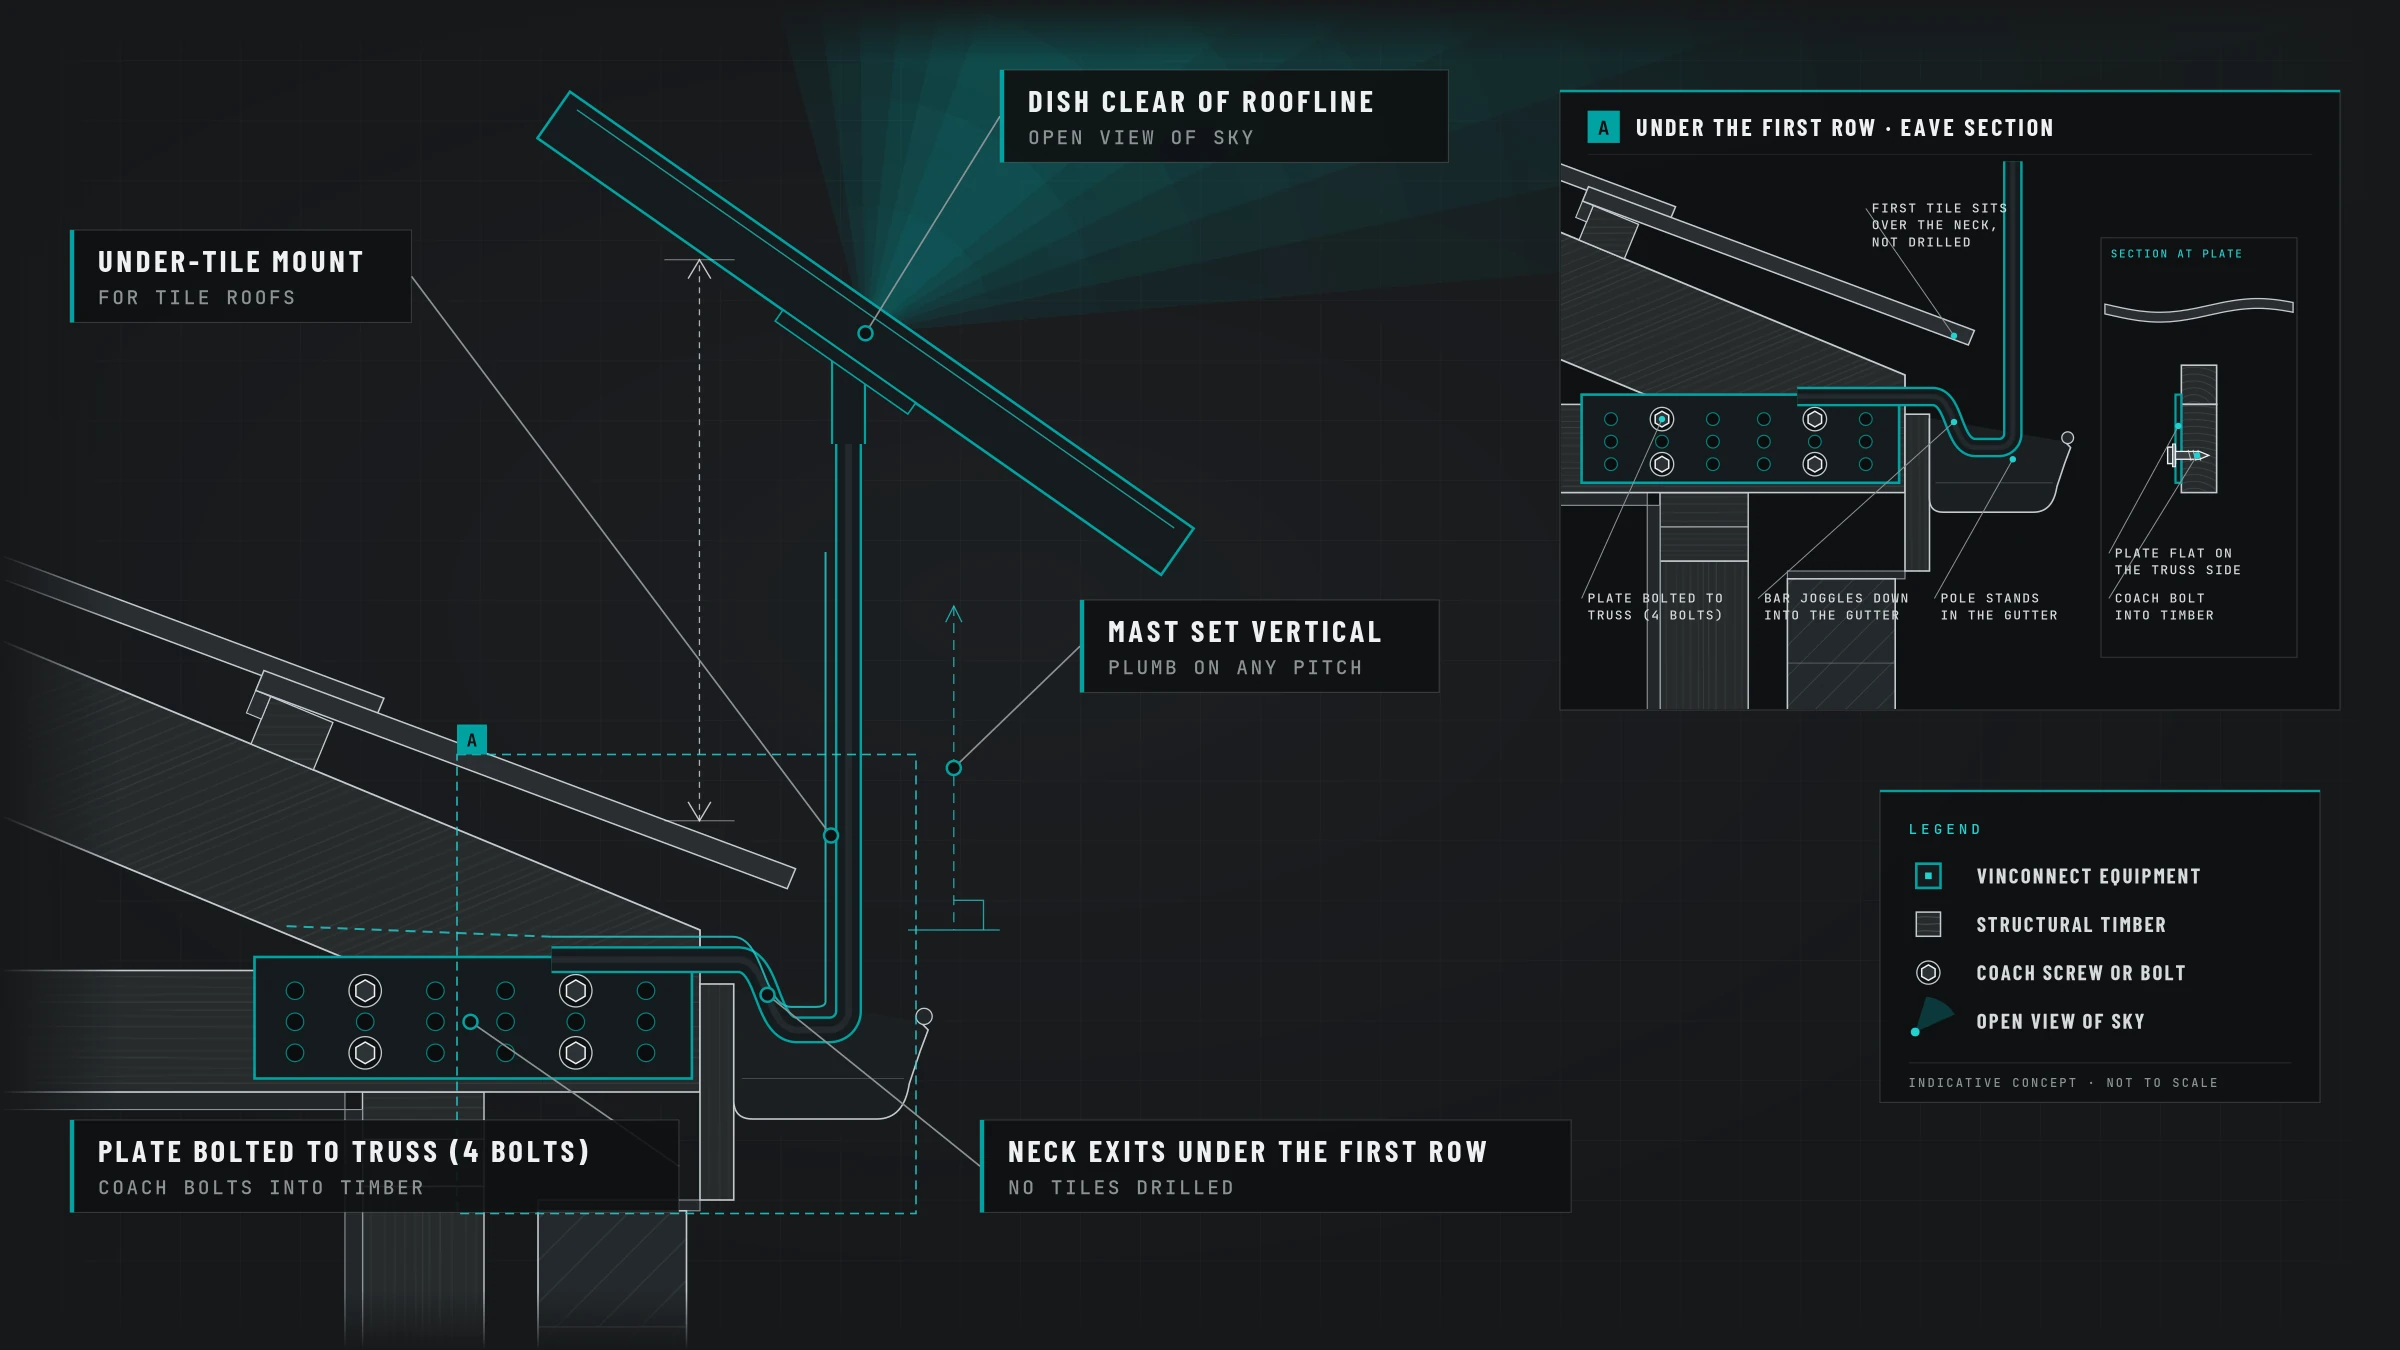
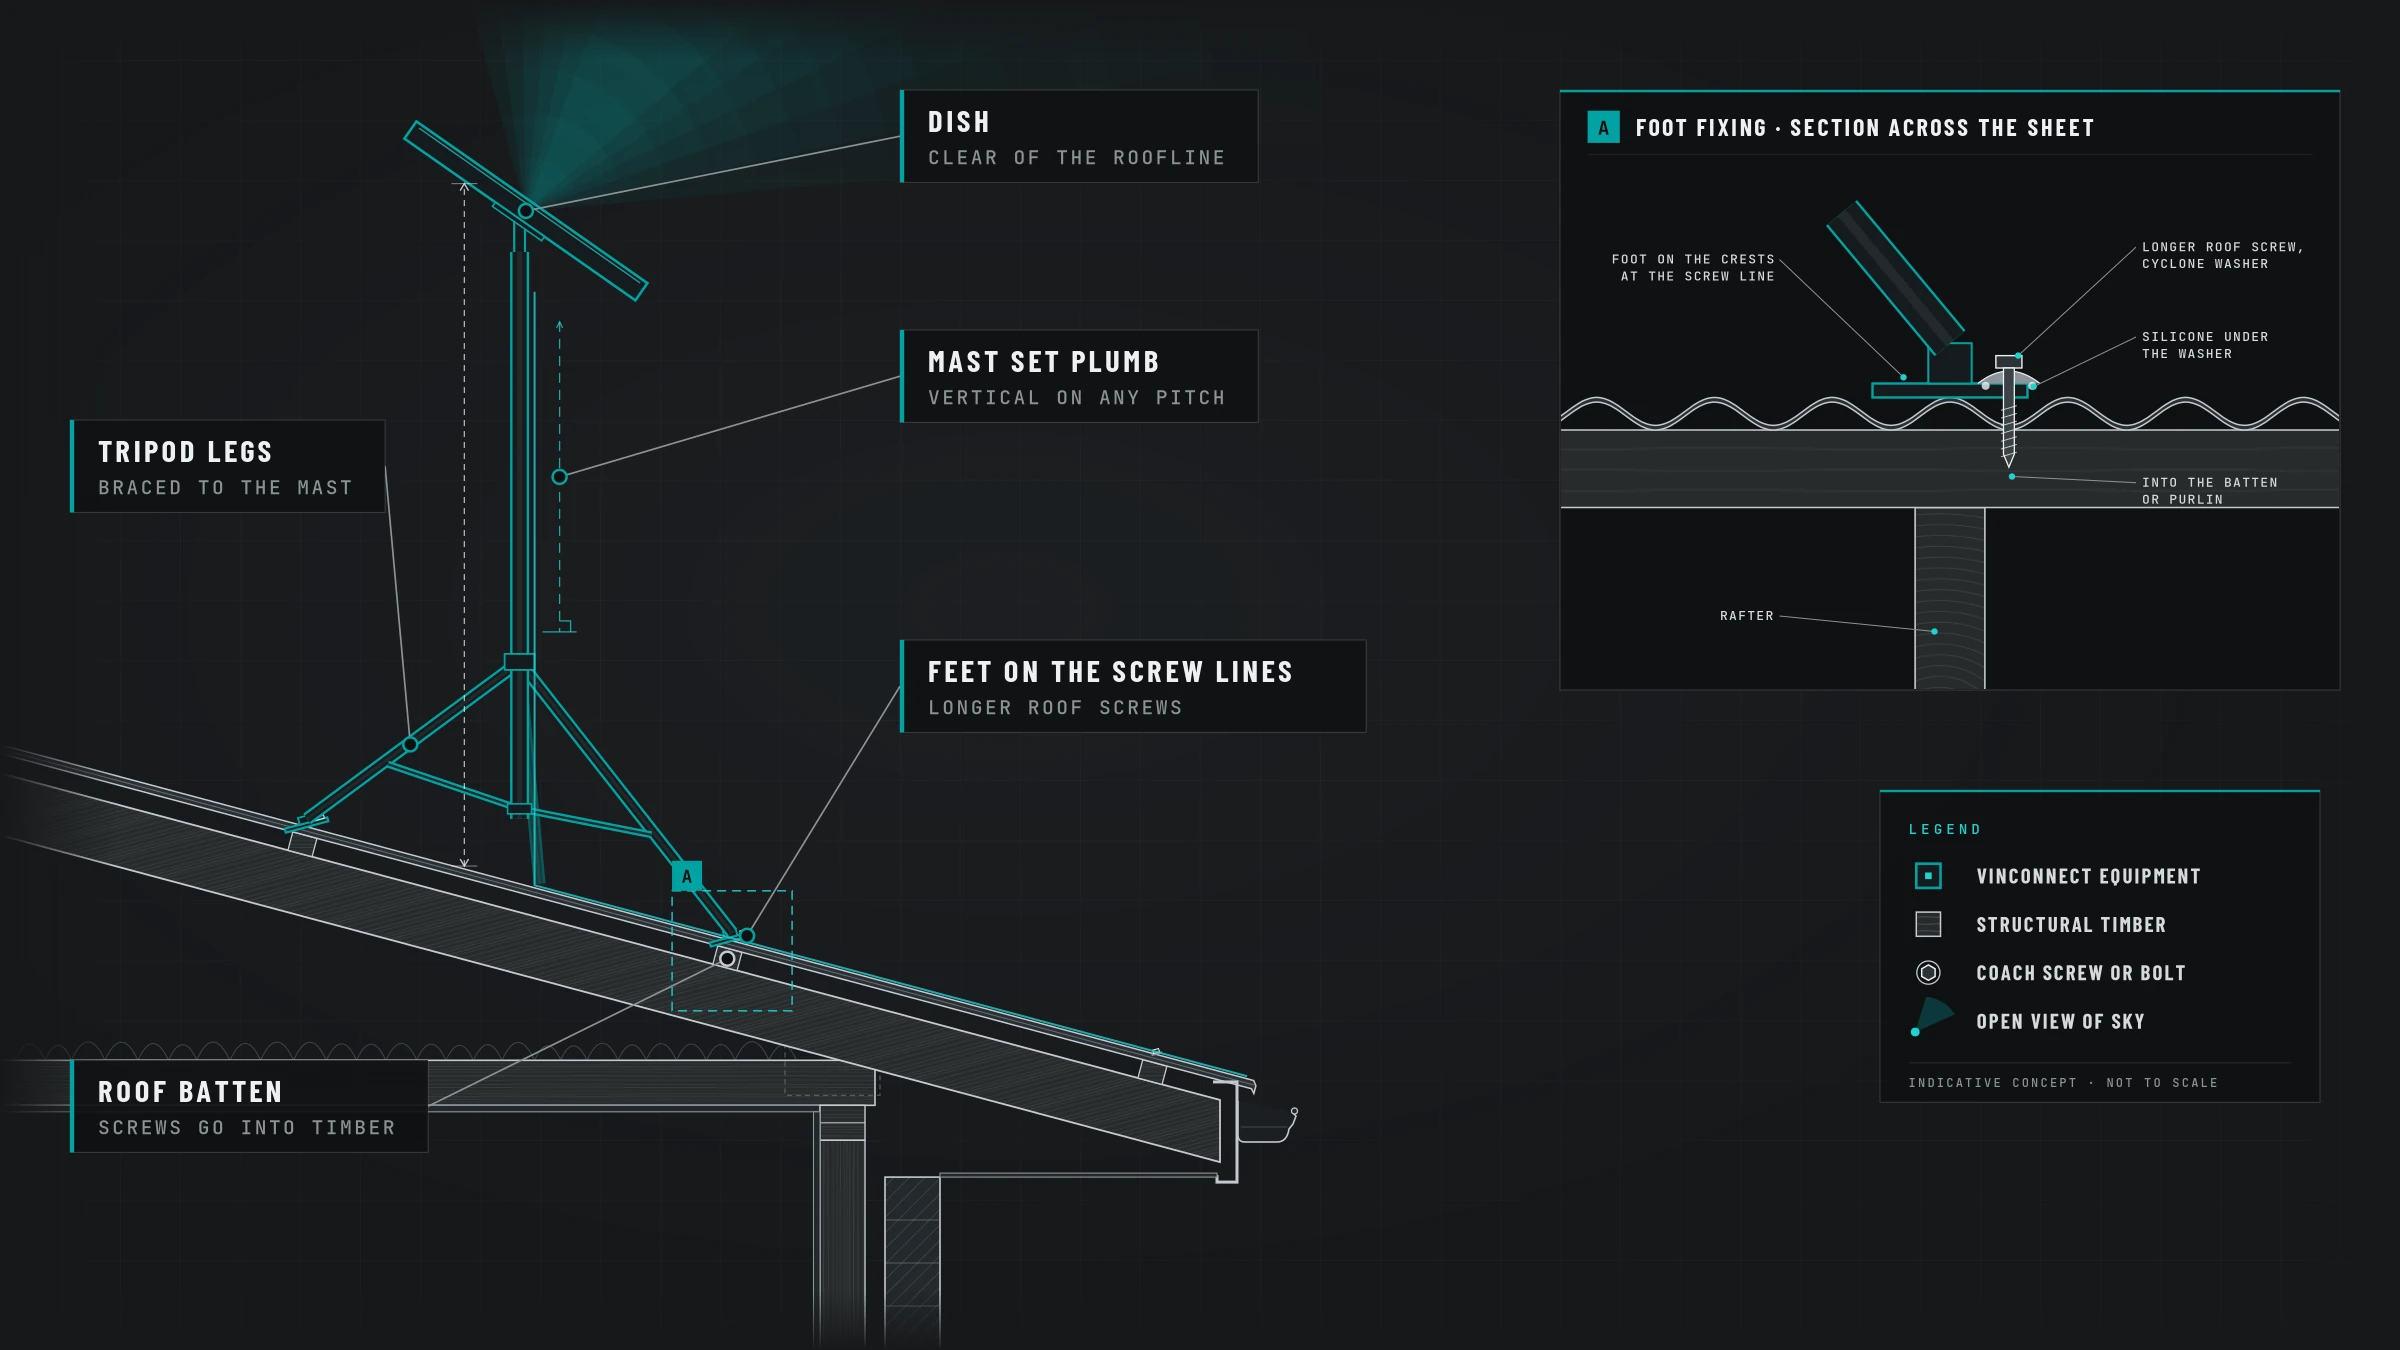
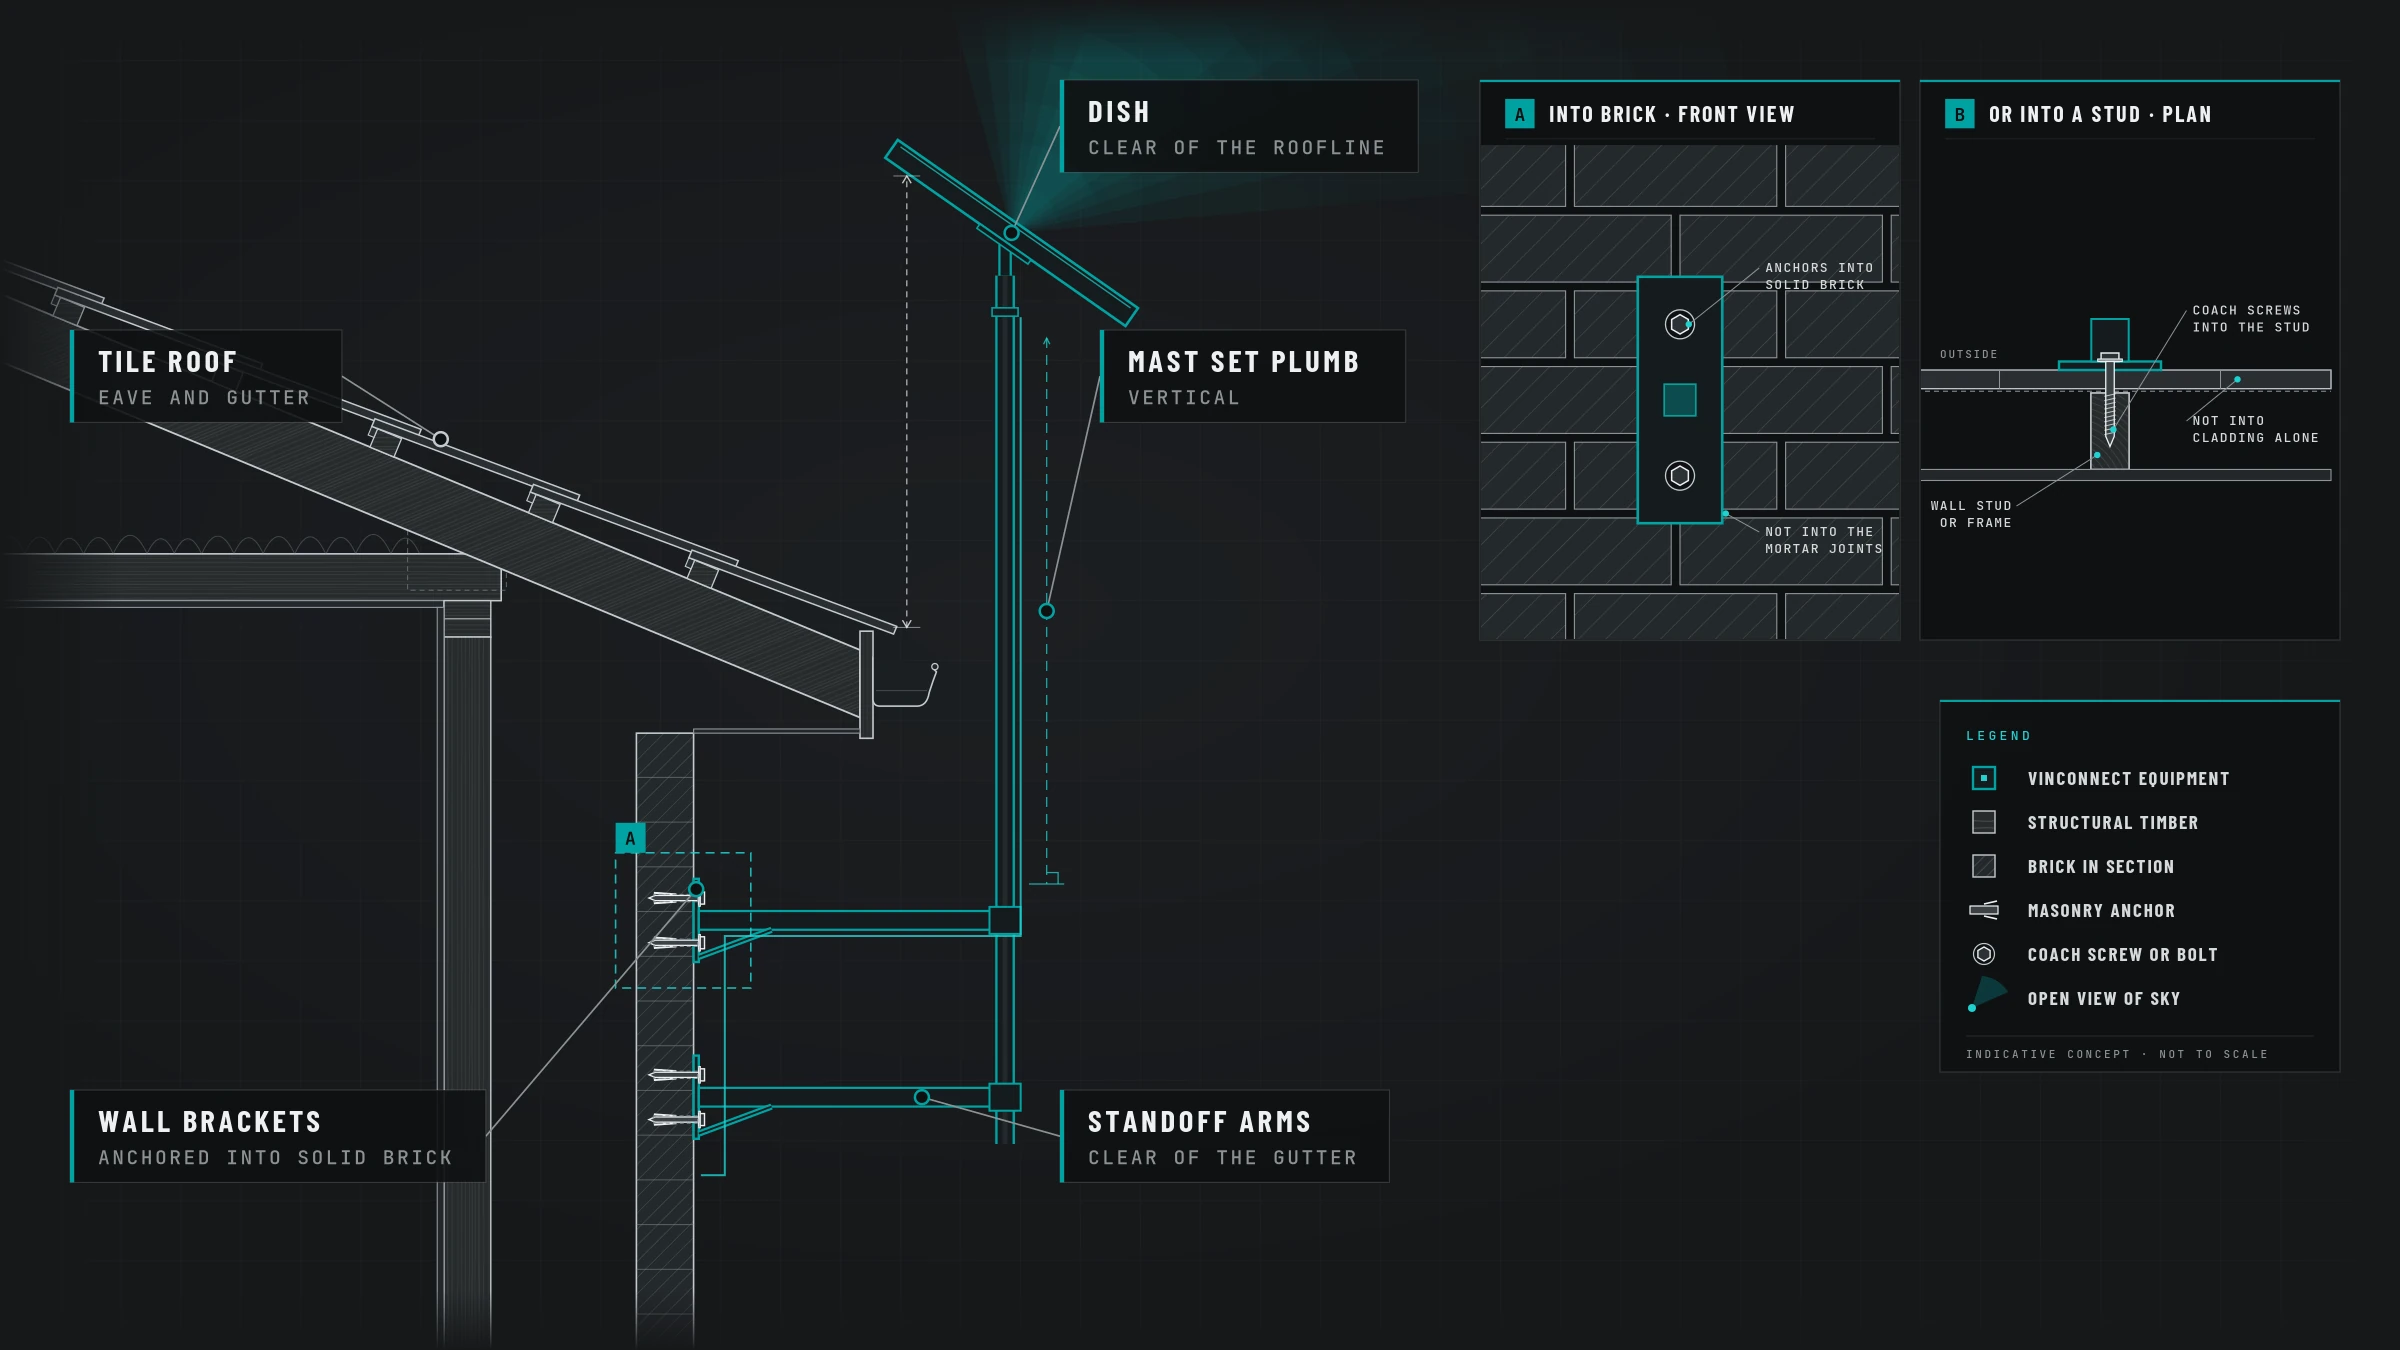
On tile roofs we use an under-tile mount. Its bracket fixes to the side of a roof truss and the tile slides back over it, so no tiles are drilled. On Colorbond we use a tripod tied down to the existing roof screws. A fascia or wall mount works when the fascia is sound and the sky view is there, and we check the fascia first.
The mount hardware is itemised separately from labour. A standard install assumes a straightforward mount, not a custom fabrication.
Tell us before the visit
Storeys, roof material, and whether anyone has already said “no holes”. Photos of the proposed spot save a second trip. The Starlink mount notes go further into roof, wall and tripod choices.